
Directions

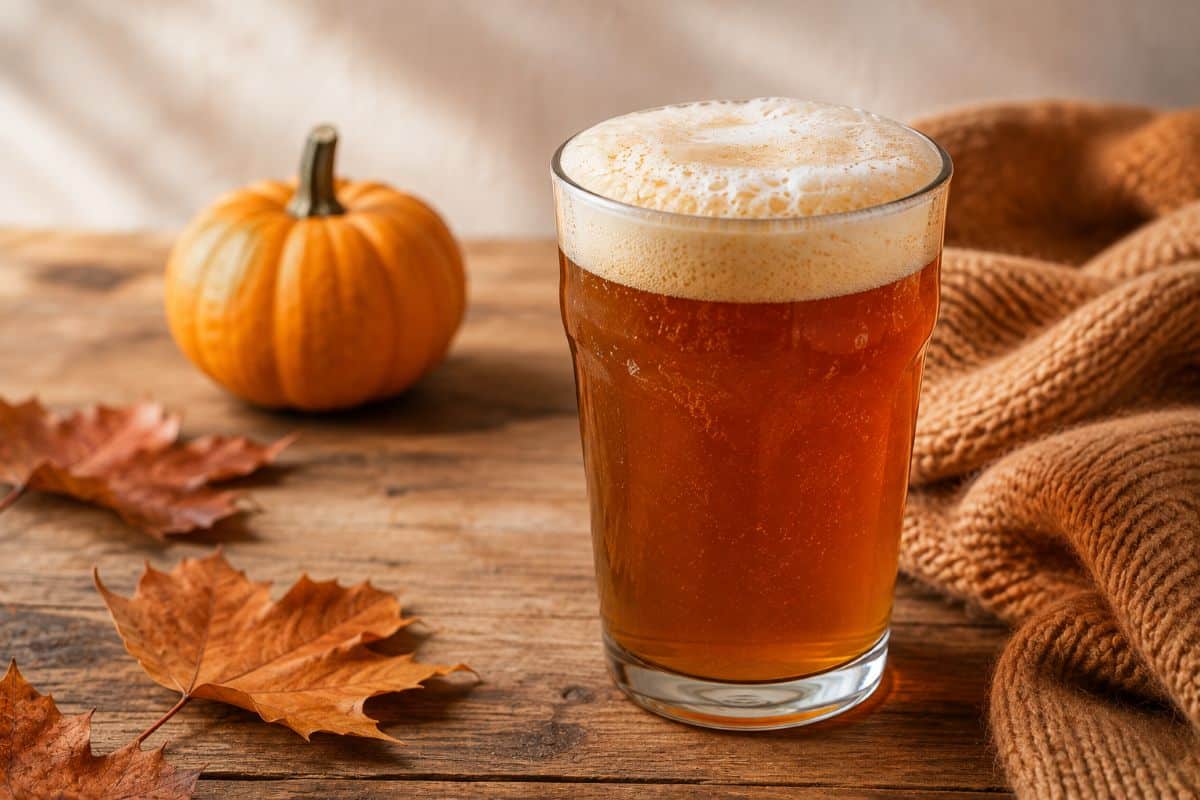
Pumpkin Ale is one of the few modern beer styles whose identity depends as much on aroma, cultural memory and ingredient balance as on malt, hops and yeast. The best examples do not taste like liquid pumpkin pie, nor should they resemble an Amber Ale drowned in cinnamon. Pumpkin should contribute body, a soft vegetal sweetness and an earthy background, while malt provides the real structural foundation. Spices should remain clearly perceptible but controlled.
The style is particularly associated with the United States, where pumpkin and other squashes were available long before a reliable domestic supply of malted barley existed. Historical accounts of colonial pumpkin beer are frequently exaggerated, but there is firm documentary evidence for “pompion ale” in 1771. That recipe instructed brewers to extract pumpkin juice, boil it, hop it and ferment it in a manner comparable to malt beer.
The historical drink would have been dramatically different from most contemporary Pumpkin Ales. Modern versions generally use barley malt as their foundation and pumpkin as an adjunct, while cinnamon, nutmeg, ginger, allspice and occasionally clove reproduce the aromatic associations of American pumpkin pie.
The contemporary craft-beer interpretation took shape during the American brewing revival of the 1980s. Since then, Pumpkin Ale has developed into an entire seasonal category encompassing Amber Ales, Brown Ales, Porters, Stouts, strong ales and even sour beers.
Current professional competition guidelines consequently treat Pumpkin Beer as a specialty beer rather than one rigid base style. Alcohol, colour and gravity can vary considerably. What matters is balance: the underlying beer must remain identifiable, while pumpkin and spices should complement rather than obscure it.
For homebrewing, an Amber Ale base around 5.5–6% ABV is particularly reliable. Caramel and toasted malt naturally reinforce roasted pumpkin, moderate bitterness prevents sweetness from becoming tiring, and the beer remains light enough for the spices to remain distinct.
The following recipe produces approximately 20 litres and deliberately keeps the process straightforward without sacrificing technical precision.
The Basics
- Batch size: 20 litres
- Style: Pumpkin Spice Amber Ale
- Brewing method: All-grain
- Original Gravity: approximately 1.056
- Final Gravity: approximately 1.012
- ABV: approximately 5.8%
- Bitterness: approximately 22 IBU
- Colour: approximately 25–30 EBC
- Carbonation: 2.1–2.3 volumes CO₂
- Mash temperature: 67°C
- Boil: 60 minutes
- Primary fermentation: approximately 7–10 days
- Conditioning: 10–14 days
- Bottle conditioning: approximately 2–3 weeks
- Total time before drinking: approximately 5–6 weeks
Ingredients
Grain Bill
- 3.6 kg Pale Ale malt
- 600 g Munich malt
- 350 g medium Crystal malt, approximately 120–150 EBC
- 200 g Biscuit malt
- 150 g wheat malt
- 200–300 g rice hulls
Pumpkin
- 1.5–2 kg raw culinary pumpkin
or
- 1.2–1.5 kg unsweetened canned pumpkin purée
Hops
- 25 g East Kent Goldings, approximately 5% alpha acid — 60 minutes
- 15 g East Kent Goldings — 15 minutes
Spices
- 2.5 g ground cinnamon
- 1 g ground ginger
- 0.5 g freshly grated nutmeg
- 0.4 g ground allspice
- 0.1 g ground clove, optional
Yeast
- 1 packet Fermentis SafAle US-05
or
- White Labs WLP001 California Ale
- Wyeast 1056 American Ale
Optional
- ½ vanilla bean during conditioning
- 50–80 g light brown sugar during the final 10 minutes of the boil
- 100–120 g dextrose for bottle conditioning, depending on desired carbonation
Which Pumpkin Should You Use?
The giant pumpkins sold for Halloween decoration are a poor choice.
They are bred primarily for size and appearance, not flavour. Their flesh tends to be watery, fibrous and relatively bland.
Choose a dense culinary squash with naturally sweet flesh.
Good options include:
- Sugar Pumpkin
- Pie Pumpkin
- Butternut Squash
- Kabocha
- Hokkaido
- Delica
Butternut squash is particularly useful for brewing because it is widely available, relatively dry and naturally sweet.
Strict botanical authenticity matters less than flavour. Modern brewing guidelines permit both pumpkin and winter squash in the category.
Does Pumpkin Actually Add Much Flavour to Beer?
Less than many people expect.
Pumpkin itself has a delicate flavour. Once fermented alongside malt and hops, much of its immediately recognisable character becomes subtle.
Its principal contributions are:
- additional body
- mild earthy sweetness
- soft squash character
- colour
- texture
- some fermentable carbohydrate
The unmistakable aroma most drinkers associate with “pumpkin beer” generally comes from the spice blend rather than the pumpkin itself.
This distinction explains why some commercial beers can strongly evoke pumpkin pie despite containing relatively little pumpkin.
A better homebrew uses both: real pumpkin for structure and authenticity, restrained spices for aromatic definition.
Why Roast the Pumpkin First?
Do not put raw pumpkin directly into the mash unless there is a specific reason to do so.
Roasting performs several useful functions.
It removes water, concentrates flavour and creates browned surfaces through caramelisation and Maillard reactions. The finished squash develops flavours closer to baked pumpkin, toasted sugar and nuts rather than raw courgette.
Cut the pumpkin into sections, remove the seeds and roast at 190°C for approximately 45–60 minutes.
The flesh should become completely soft and develop some browned edges.
Allow it to cool, remove the skin and mash the flesh roughly.
If using canned pumpkin, select 100% pumpkin purée, not pumpkin pie filling.
Pumpkin pie filling already contains sugar and spices and gives the brewer considerably less control.
Why Add Pumpkin to the Mash?
The mash is the most convenient point for incorporating roasted pumpkin in an all-grain recipe.
Mixing pumpkin with malt allows enzymes from the malt to act on available starches while the wort extracts colour, flavour and soluble material.
There is one important problem: pumpkin can make the mash extremely sticky.
That is why this recipe includes rice hulls.
Rice hulls contribute practically no flavour or fermentable extract. Their purpose is mechanical: they create channels through the grain bed and help wort drain during lautering.
Use at least 200 g, and increase this towards 300 g if your pumpkin purée is particularly thick.
Water Profile
Pumpkin Ale does not require an extreme brewing-water profile.
For a balanced Amber Ale base, aim approximately for:
- Calcium: 50–80 ppm
- Magnesium: 5–15 ppm
- Sodium: below 50 ppm
- Chloride: 60–90 ppm
- Sulfate: 40–70 ppm
- Bicarbonate: adjusted according to mash pH
A slight chloride emphasis gives the malt a rounder texture.
Aim for a mash pH of approximately 5.2–5.4 measured at room temperature.
Avoid very high sulfate levels. A sharply hop-accentuated water profile fights the soft malt and spice character we want from the beer.
Step 1: Roast the Pumpkin
Preheat the oven to 190°C.
Cut 1.5–2 kg pumpkin into large pieces and remove the seeds.
Roast for 45–60 minutes, until completely soft and browned around the edges.
Cool.
Scoop the flesh from the skin and mash it roughly.
You should end with approximately 1.2–1.5 kg cooked pumpkin.
Do not worry about making a completely smooth purée.
Step 2: Prepare the Mash
Heat approximately 16 litres of brewing liquor to the temperature required to obtain a mash at 67°C.
Mix the rice hulls through the crushed grain before adding the pumpkin.
Mash in gradually.
Once the grain is thoroughly hydrated, add the roasted pumpkin and distribute it throughout the mash.
Hold at 67°C for 60 minutes.
This moderately warm mash temperature provides enough fermentability for a clean finish while preserving sufficient dextrins to support pumpkin and spices.
A mash closer to 63–64°C can produce a beer that feels too thin.
A mash above 69°C risks creating excessive residual sweetness.
Step 3: Mash Out and Lauter
Raise the mash to approximately 75–76°C for 10 minutes if your equipment permits.
Recirculate slowly.
Do not begin runoff aggressively. Pumpkin can compact the grain bed and cause a stuck sparge.
Collect the first wort gently.
Sparge with water at approximately 75–77°C until you have enough wort for your normal 60-minute boil, typically around 25 litres, depending on your evaporation rate and equipment losses.
If runoff slows dramatically, do not compress the grain bed.
Stir carefully, allow it to settle again and resume slowly.
Step 4: Boil for 60 Minutes
Bring the wort to a vigorous boil.
At 60 minutes remaining, add:
- 25 g East Kent Goldings
At 15 minutes remaining, add:
- 15 g East Kent Goldings
At this point also add kettle finings if normally used.
The target bitterness is approximately 22 IBU.
Pumpkin Ale should not be aggressively bitter. Hops provide structure and prevent malt sweetness from becoming cloying, but they should remain behind pumpkin, toasted malt and spices.
Why East Kent Goldings?
East Kent Goldings provide restrained earthy, herbal and lightly floral characteristics.
They integrate naturally with cinnamon, nutmeg, toasted malt and roasted squash.
Other suitable hops include:
- Willamette
- Fuggle
- Styrian Goldings
- Crystal
Avoid large additions of intensely tropical American varieties unless deliberately creating a modern hybrid.
Mango, passion fruit and resinous hop aromas can easily distort the classic autumn profile.
Step 5: Add the Spices
With 5 minutes remaining in the boil, add:
- 2.5 g cinnamon
- 1 g ginger
- 0.5 g nutmeg
- 0.4 g allspice
- no more than 0.1 g clove
This looks like a tiny amount.
That is intentional.
Spices become remarkably dominant in beer, particularly after several weeks of conditioning. Clove is especially dangerous: a fraction too much can transform the entire batch into something medicinal.
You can always increase spice intensity later.
Removing excessive cinnamon or clove is impossible.
An Even Better Method: Make a Spice Tincture
For maximum control, add only half the spice quantity during brewing and reserve the remainder.
Soak the reserved spices in approximately 50 ml neutral vodka for several days.
After primary fermentation, draw a measured sample of beer and add the tincture drop by drop until the balance is right.
Scale that quantity to the full batch.
This technique is considerably more precise than blindly adding a large quantity of spice to the kettle.
Professional brewing with spices is largely an exercise in dosage control.
Step 6: Chill the Wort Quickly
At flameout, cool the wort as rapidly as your equipment allows to approximately 18–19°C.
Transfer to a sanitised fermenter.
Aerate thoroughly before pitching the yeast.
Measure the gravity.
The target is approximately:
OG 1.054–1.058
Small differences are normal because pumpkin has variable water and sugar content.
Step 7: Fermentation
Pitch US-05 or another clean American ale yeast at approximately 18°C.
Keep fermentation around 18–19°C for the first 3–4 days.
As activity slows, allow the temperature to rise naturally towards 20–21°C.
This helps the yeast complete attenuation and clean up fermentation by-products.
Do not ferment excessively warm.
A very fruity yeast profile competes with pumpkin spices and makes the beer taste muddled.
Primary fermentation will normally finish within 7–10 days, but gravity—not the airlock—is the reliable indicator.
Target final gravity:
FG approximately 1.010–1.014
Why Use a Clean American Ale Yeast?
The purpose of the yeast here is fermentation, not aromatic domination.
US-05, WLP001 and Wyeast 1056 produce relatively clean fermentation profiles and allow toasted malt, pumpkin and spices to remain clear.
An English strain can also be excellent if you want more fruit and malt character.
For a first Pumpkin Ale, however, neutral yeast reduces variables and makes recipe adjustments much easier.
Step 8: Taste Before Adding More Spice
Once final gravity is stable, taste the beer.
Do not judge only the aroma.
Ask:
Is cinnamon obvious?
Can you detect nutmeg?
Does the beer still taste like beer?
Is pumpkin or squash perceptible behind the malt?
Does the finish remain drinkable?
If the spice profile is too restrained, add a small amount of tincture.
Repeat after mixing.
Stop earlier than instinct suggests.
Spice character often becomes more integrated and perceptible during conditioning.
Optional Vanilla
Vanilla is not essential.
If you want a rounder pumpkin-pie character, add approximately half a vanilla bean during conditioning for 3–5 days.
Split the bean lengthwise.
Avoid excessive vanilla extract. Combined with crystal malt and cinnamon, it can make the beer seem much sweeter than its measured final gravity suggests.
Step 9: Condition the Beer
Allow the finished beer to condition for another 10–14 days.
Cold conditioning for several days around 2–4°C can improve clarity and help suspended spice and pumpkin material settle.
Perfect brilliance is not essential in Pumpkin Ale, but excessive sediment creates a muddy texture.
Step 10: Bottle or Keg
For bottle conditioning, aim for approximately 2.1–2.3 volumes of CO₂.
For 20 litres of beer at typical room temperature, around 100–120 g dextrose is a reasonable starting range, but calculate priming sugar according to actual beer temperature and desired carbonation.
Bottle and condition around 20°C for approximately 2–3 weeks.
Kegged beer can be carbonated directly to the same general level.
Avoid excessive carbonation. Pumpkin Ale benefits from enough CO₂ to refresh the palate, but aggressive fizz makes cinnamon and other spices feel sharper.
What Should Good Pumpkin Ale Taste Like?
A balanced version should begin with toasted bread, caramel and gentle roasted-pumpkin character.
Then come the spices.
Cinnamon is normally the most immediately recognisable, followed by nutmeg and ginger. Allspice adds depth rather than a separate obvious flavour.
Hop bitterness should remain moderate.
The finish should be dry enough for another sip.
That final point is critical.
A Pumpkin Ale can smell like dessert. It should not drink like syrup.
Pumpkin Ale vs Pumpkin Spice Beer
The distinction is useful.
A Pumpkin or Squash Beer emphasises actual pumpkin or winter squash and does not necessarily contain spices.
A Pumpkin Spice Beer combines pumpkin or squash with spices such as cinnamon, nutmeg, ginger, clove or allspice.
The recipe in this guide is therefore technically a Pumpkin Spice Beer based on an American Amber Ale.
The category is intentionally broad. Current professional guidelines allow Pumpkin Spice Beer from approximately 2.5% to 12% ABV, with bitterness roughly between 5 and 35 IBU.
That enormous range shows why “Pumpkin Ale” should be understood as a concept built on a base beer rather than one rigid brewing style.
Can You Brew It Without Real Pumpkin?
Yes, but the result is better described as a pumpkin-spice beer.
Many drinkers primarily associate pumpkin with cinnamon, nutmeg and other pie spices, so a malt beer containing those aromatics can create a convincing sensory illusion.
However, real roasted pumpkin contributes subtle body and earthy depth that spices alone cannot reproduce.
For a beer explicitly called Pumpkin Ale, I prefer using actual pumpkin.
Can You Use Pumpkin Purée?
Yes, and for many homebrewers it is the easiest method.
Choose unsweetened 100% pumpkin purée.
Spread it approximately 1–2 cm thick on baking trays and roast at 190°C for 30–45 minutes before adding it to the mash.
Roasting canned purée removes some water and creates additional browned flavour.
Do not use canned pumpkin pie filling.
Should Pumpkin Go in the Mash or the Boil?
Both methods are possible.
Mash
Advantages:
- allows malt enzymes access to starches
- integrates pumpkin smoothly
- reduces large quantities of pulp entering the fermenter
Disadvantage:
- increased risk of a stuck mash
Boil
Advantages:
- stronger direct extraction
- simpler for extract brewers
Disadvantages:
- considerable trub
- pumpkin can scorch
- poorer wort recovery
- large amounts of vegetal sediment
For an all-grain Pumpkin Ale, the mash is generally the cleaner method.
Can You Brew Pumpkin Ale with Extract?
Yes.
For approximately 20 litres, replace the base grain bill with roughly:
- 3 kg light liquid malt extract
or
- 2.4–2.5 kg light dry malt extract
Steep approximately:
- 300 g Crystal malt
- 150 g Biscuit malt
Use 1–1.2 kg roasted pumpkin purée during the boil, preferably inside a large fine-mesh brewing bag.
Boil gently and stir regularly to prevent scorching.
The remainder of the hop, spice and fermentation schedule can remain similar.
Why Pumpkin Ale Often Fails
Too Much Spice
This is by far the most common problem.
Cinnamon, clove and nutmeg should suggest pumpkin pie rather than turn the beer into potpourri.
Too Much Crystal Malt
Pumpkin does not need an excessively sweet base beer.
Large quantities of caramel malt plus vanilla and cinnamon create a beer that tastes cloying even if attenuation is technically adequate.
Not Enough Pumpkin
A token 300 g of pumpkin in a 20-litre batch contributes almost nothing.
Use a meaningful quantity or omit it entirely and deliberately make a spice beer.
Using Watery Decorative Pumpkin
Large carving pumpkins contribute water and fibre but surprisingly little flavour.
Too Much Clove
Clove contains intensely aromatic compounds and should be measured extremely carefully.
Excessive Hopping
Pumpkin Ale is not an IPA with cinnamon.
Keep bitterness controlled and hop aroma subordinate.
Drinking It Too Young
Immediately after fermentation, spices can seem disconnected and aggressive.
Two or three weeks of conditioning usually produces a much more coherent beer.
How Long Does Homemade Pumpkin Ale Last?
A moderate-strength Pumpkin Ale is usually best within approximately 3–6 months of packaging.
Young beer shows fresher spice.
With time, cinnamon and ginger soften while malt becomes more dominant.
Stronger examples around 8–10% ABV can mature considerably longer, but the recipe above is designed for freshness and drinkability rather than ageing.
Store bottles upright, cool and away from light.
Serving Temperature
Serve at approximately 8–10°C.
Straight from a refrigerator at 3–4°C, the beer will seem muted.
Allowing it to warm slightly reveals:
- cinnamon
- nutmeg
- toasted malt
- caramel
- pumpkin
- fermentation aroma
An American pint glass is perfectly adequate, although a tulip glass concentrates the spice aroma more effectively.
Food Pairings
Pumpkin Ale has enough malt sweetness and spice to handle dishes that would overwhelm a delicate Pale Ale.
Good pairings include:
- roast pork
- glazed ham
- roast turkey
- grilled sausages
- pumpkin risotto
- roasted squash
- aged Cheddar
- Gouda
- blue cheese
- pecan pie
- apple crumble
It is particularly effective with roast pork and baked pumpkin, where caramelised flavours in the food echo the malt and roasted squash in the beer.
Avoid extremely hot chilli dishes. Capsaicin can make cinnamon and alcohol feel harsher.
Pumpkin Ale Recipe at a Glance
Batch: 20 litres
OG: 1.056
FG: 1.012
ABV: 5.8%
IBU: 22
Mash: 67°C for 60 minutes
Boil: 60 minutes
Malt: Pale Ale, Munich, Crystal, Biscuit and a little wheat
Pumpkin: 1.5–2 kg raw, roasted before mashing
Hops: East Kent Goldings
Yeast: US-05
Spices: cinnamon, ginger, nutmeg and allspice, with clove used only in trace quantity
Fermentation: 18–20°C
Conditioning: at least 10–14 days
A Better Pumpkin Ale Comes from Restraint
Pumpkin Ale looks complicated because there are so many potential ingredients, but brewing a good one is fundamentally an exercise in subtraction.
Start with a balanced Amber Ale.
Use enough real roasted pumpkin to make the ingredient meaningful. Choose malts that reinforce toasted and caramelised flavours without making the wort excessively sweet. Keep hops restrained. Ferment cleanly.
Then add less spice than you think you need.
The difference between a serious Pumpkin Ale and a cinnamon-flavoured novelty beer is usually not another ingredient. It is control.
A good glass should smell unmistakably of autumn, but after the first impression of cinnamon, roasted squash and toasted malt, it must still behave like beer: balanced bitterness, proper fermentation, moderate sweetness and enough dryness to make you want the second glass.


